The Process
Step 1. Get Clay.
Step 2. Prepare the clay.
Step 2. Prepare the clay.

You can dig clay out of the ground or you can buy it. It is satisfying to do the whole process from start to finish, as our prehistoric ancestors did it, by digging the clay and firing it in an open fire pit. Clay purchased from a clay store, however, requires no digging and is uniform in consistency, fires to a specific temperature and has no impurities. There are three kinds of clay: earthenware, stoneware and porcelain. Within each category are countless choices, each with a specific texture and color. Each year I buy 800 pounds of stoneware clay.
Step 2. Prepare the clay.
Step 2. Prepare the clay.
Step 2. Prepare the clay.

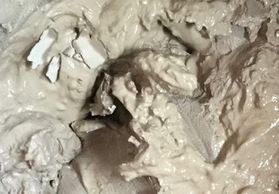
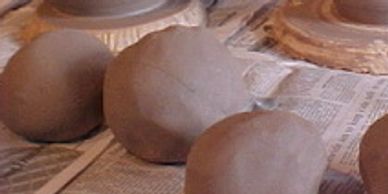
For hand-built pieces, I use clay straight out of the box, but for wheel thrown pieces, I put the clay block in a huge tub with water and soften it up. Once soft, the wet, oozing mass goes onto a wedging table. This is a heavy-duty plaster topped table, which we made. The surface of the table is topped with three inches of plaster. The plaster absorbs excess water from the clay. The clay is kneaded on the wedging table, until it is of a uniform consistency and free of air pockets. The ball of clay is cut into wedges on a wire to check for air pockets in the clay. Air pockets are a hazard to the pottery piece because they cause a piece to blow up in the kiln. Kneading and wedging of the clay is an extremely important part of the process.
Step 3. Make the piece.
Step 2. Prepare the clay.
Step 3. Make the piece. Wheel Thrown Pieces--

The most important tools in creating clay forms, either “hand-building” or “throwing” them on the wheel, are ones own hands and fingers. In addition, I use simple tools, like tongue depressors, scrappers, knives, wooden dowels, and specially designed pottery tools that I buy. Clay will hold its shape. But until fired in a kiln, it can go back into the water to be re-used, kneaded and wedged on the wedging table once more. When I first started my own studio, I recycled my pieces over and over again, until I purchased my first kiln.
Step 3. Make the piece. Wheel Thrown Pieces--
Step 3. Make the piece. Wheel Thrown Pieces--
Step 3. Make the piece. Wheel Thrown Pieces--

Wheel Thrown Pieces--For making a symmetrical bowl, mug, plate or casserole, it is necessary to have a potter’s wheel. (My wheel is a Klopfenstein stand-up kick wheel.)
Step 3. Make the piece. Hand Built Pieces--
Step 3. Make the piece. Wheel Thrown Pieces--
Step 3. Make the piece. Hand Built Pieces--

Hand Built Pieces--Pinch, coil, slab pots or ones made using a variety of techniques, only require your hands, rudimentary tools and imagination.
Step 4. Trim the piece.
Step 3. Make the piece. Wheel Thrown Pieces--
Step 3. Make the piece. Hand Built Pieces--

Once “leatherhard” the piece should be turned upside down and excess clay should be removed from the bottom.
Step 5. Fire the Piece.
Step 6. Glaze the piece.
Step 6. Glaze the piece.

Clay must be completely dry before it is fired. Sometimes this may take a week, depending on the humidity in the air and the thickness of the clay wall. Kilns can be gas or wood fired, or electric. My kiln is electric. For the first firing, called the bisque firing, I fire the kiln to 1870 degrees Fahrenheit. It takes my kiln about 8 hours to reach this temperature. After this firing, the shape of the piece is now permanent, but it is still porous.
Step 6. Glaze the piece.
Step 6. Glaze the piece.
Step 6. Glaze the piece.

Glazes are used to add color, design and shine. Glazes may be made from glaze ingredients or purchased wet or dry. They can be dripped, poured painted or sprayed on. Underglazes can be used as well. They go on first, then the glaze.
Step 7. Fire again.
Step 6. Glaze the piece.
Step 7. Fire again.

For the second firing, the glaze firing, I fire the kiln to 2170 degrees Fahrenheit, which takes about 12 hours. Once glazed and fired a second time, the piece is called glaze ware, and is complete and ready to use and enjoy.
The Process-In Detail
Copyright © 2020 Aerobie Fields Pottery - All Rights Reserved.
Powered by GoDaddy Website Builder